Extracting Transaction History into CSV from Robinhood using Python (Scraping)

If you’re familiar with financial markets and stocks, you probably know that Robinhood (HOOD) went public recently. Couple of days ago I was trying to find a feature to download my past transactions. Unfortunately I couldn’t find anything but monthly statements or tax documents. Nothing in a CSV format! It’s a shame for such a big software company that doesn’t have this simple feature.
What should I do now? Should I enter them manually in the spreadsheet? Of course not. I don’t have that much time. Also, I’m (or any human) prone to make mistakes when entering numbers manually. Fortunately, I know Python and how to scrape data from the web. So, I have to figure out a way to extract that data and put it into a CSV file. Let’s dive into it
Prerequisites, Dependencies, and Process
Prerequisites: Basics of HTML, CSS, and Javascript. XPath. Python.
Libraries that we’re using: Selenium, BeautifulSoup, python-dotenv
Process:
- Login
- Pass the 2FA
- Go to history Page
- Download the whole history
- Extract desired information
The steps 1–4 are being done using Selenium but in step 5 we’re going to use BeautifulSoup. You can do step 1–4 manually since it doesn’t take much time and go straight to step 5 for extracting data. They’re two completely separate parts.
Also you can see the source code in GitHub: https://github.com/MRyderOC/robinhood-history-to-CSV
0. Dependencies
The below code is going to import what we need.
1. Login
For security reasons we’re going to store our username and password in a .env file and load that into our script using python-dotenv library.
So let’s define a function to do step 1–4. This function takes USERNAME andPASSWORD then writes the source of the history page on disk for further use. Also, it takes another argument path to specify the location that is going to write the source page.
Let’s create a WebDriver and load the login page of Robinhood.
We’re using geckodriver which is WebDriver for Firefox. Pretty straightforward, huh?
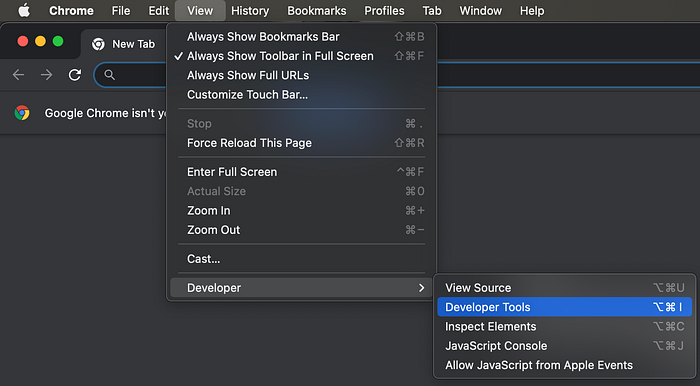
Now, it’s time to enter the USERNAME andPASSWORD . First we have to find the text box elements. On your chrome browser go to View → Developer → Inspect Elements or just simply press Command + Option + I (Shift + Ctrl + J).
Then point your mouse to the text box and click to find the element. On the right page you can see the element. We want the XPath of that. Right click on the element → Copy → Copy XPath.
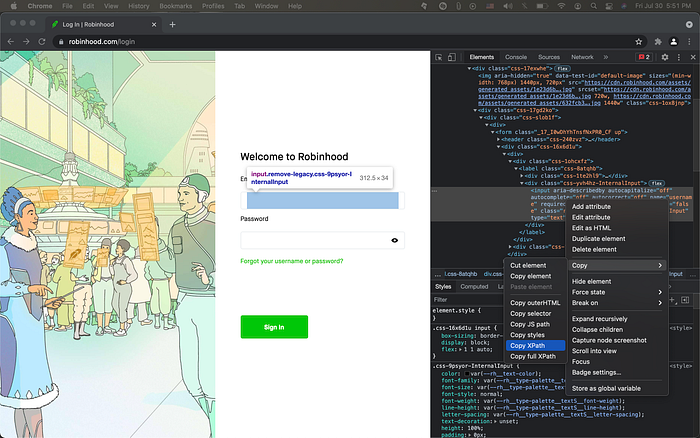
We’re going through this process a couple of times. So I’m gonna refer to it as XPath extraction.
We have to do XPath extraction for the Password text box as well. Now that we have the XPaths we can find the elements using driver:
Now let’s fill those text boxes:
.send_keys(sample_string) function is like typing the sample_string in the text box.
The only thing that remains in this page is to click on Sign In buttons. Extract the XPath for the Sign In button and just use the .click() function to click on the button:
2. Pass the 2FA
Here comes the tricky part! Two scenarios can happen here. Either you already signed for 2FA or not (at least I saw these two!). If you turned the 2FA before, the site will require you to enter a 6-digit code. If you didn’t turn 2FA on, it will show a button to send you a SMS. After clicking on the SMS button, again it will require you to enter a 6-digit code. So, what do we need? XPath of SMS button, 6-digit code text box XPath, and Continue button XPath to submit the code. How do we get the code? Using built-in function input() . Remember you have to enter the code in the terminal not in the browser. If you enter the code on the browser, the program won’t continue. Let’s code these:
Voila! We’re logged in!!!
3. Go to history page
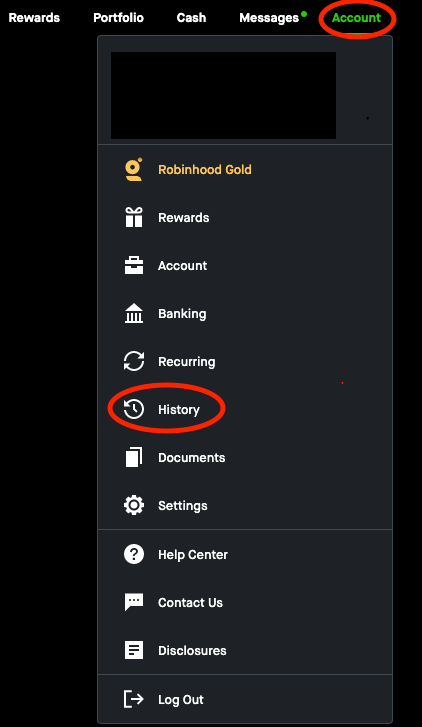
We need to click on the Account on the top right and after that, click on the history. For sure we need the XPath of these two.
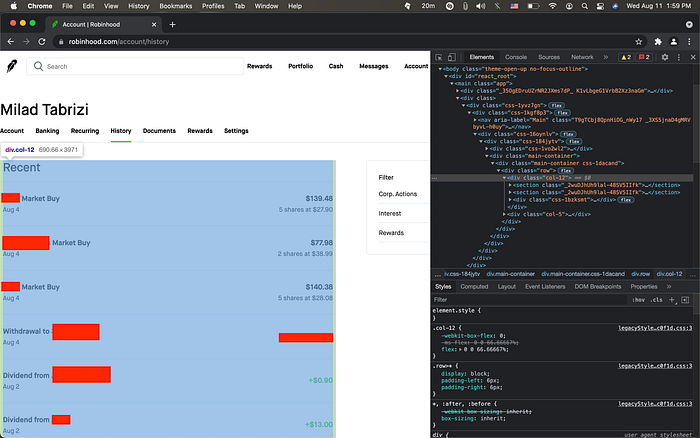
Done!! We’re in the history page.
4. Download the whole history
There is one thing in here. This page doesn’t show the whole history. If you scroll down, you can see the page is loading more data. So, we have to scroll down to the bottom of the page then download the page source. How can we do that? Using javascript! We can execute javascript using our driver with execute_script() function. One of those javascript functions returns the scroll height of the page: document.body.scrollHeight . The other one can scroll the page: window.scrollTo(0, document.body.scrollHeight) . When the scrollHeight does not change anymore, we reach the bottom. Also, we need to set a sleep timer to make sure new data is loaded.
Let’s use them:
After a couple of seconds (depending on how many transactions you have), you’re gonna reach the bottom and ready to download the page source and write it on disk.
Remember our path argument in find_history_page_by_selenium ? We use that here :) . Now is the time to extract the data we want using BeautifulSoup.
5. Extract desired information
If you did step 1–4 now you have a file with the name of path in your current directory. If didn’t, you have to do that manually (Login → Account → History → Scroll down to the bottom → Inspect the page → Edit as HTML → Copy on a file → save as name.html).
We’re using BeautifulSoup to extract the data.
- Why BeautifulSoup? Because it’s easy.
- Why not Scrapy? Because it’s just a single page. We can get what we want with a small library like BeautifulSoup. We don’t need a full framework for this.
- Can we integrate Selenium with Scrapy to do this job for us? Yes. Check this out.
Before anything we need a function to make a list “CSV ready”. What I mean by that is removing all occurrences of commas (,) from all of the elements in a list. This will help us a lot in future. You’ll see.
Now let’s define a function that takes path as an argument and writes transactions information on disk as a CSV.
To the best of my knowledge, there are 6 types of transactions in here:
- Interest payments (Based on cash you have in your account)
- Transfers (Deposit, Withdrawal)
- Stocks
- Cryptos
- Dividends
- Corp Actions (like Stock Splits)
So we need 6 lists to store this data. Let’s read the data using the built-in codecs library and make a BeautifulSoup object.
The .find() function for div tag that has the class col-12 is for extracting the part of the html file which has the transactions history:
Also, if you click on any of these transactions, it will show some extra details depending on the type of transaction (Transfer, Stocks, Interest, etc.) like date, symbol, amount, status, etc. So, we have some buttons (the clickable transactions) which I refer to as trxsButtons and we have some divs (the expanded part when you click on a transaction) which I refer to as trxsDivs.
How to find these? With their attributes:trxsButtons :
tag_name: header, attribute: class=’rh-expandable-item-header-98210179’trxsDivs:
tag_name: div, attribute: class=’css-2ae82m’
Every transaction in trxsButtons has this extra \n in their text. So we have to get rid of those as well. (line 3 of above code).
Also, in every transaction in trxsDivs we need only the text of span tags which has the class css-ktio0g and we need to get rid of commas as well.
In addition, we need some data structure to keep track of visited transactions which I refer to as divs_and_buttons and we’re gonna store corresponding buttons and divs of every transaction in this dictionary. (line 10)
Now, we can get rid of divs , buttons , trxsDivs , trxsButtons . (line 11)
The rest is just extracting desired data using this dictionary.
Most of these are straightforward and make sense to you if you print the divs_and_buttons and see the structure. Except for dividends. I’ll explain that later.
Stocks, Cryptos, and CorpActions
Transfers, Interests, and Dividends
The problem with dividends is that they do not include the ticker names and some of the dates are missing. Also, their text format is not compatible with CSV files. So, we’re gonna include dividends in a list and deal with them in separate part.
Others
This part is for transactions that didn’t fit in any of the above like Bonuses. If the divs_and_buttons['visited] == 'False' then the transaction falls in this category.
Writing to a file
Now we just have to write the lists in separate files:
Conclusion
This is a process of scraping data from Robinhood website and to be honest in the real world you have to struggle with this kind of messy data if you don’t have some API or clean way to collect data.
For sure this script is prone to bugs. Actually, every scraping script is prone to bugs. Why? Because it relies on the website’s architecture. If the developers change the website, your script won’t work any more. Particularly for this script, I capture the parts or transactions that I encountered in my own account and it’s possible that yours is different. Please let me know if you find any bugs in it. You can do that by opening an issue in here.
I recommend reviewing the transactions after scraping. As I said before, this script is prone to bugs.
I hope you enjoyed it!!